Today I'm partnering with Minted Art to show you how I'm decorating my home office! They graciously supplied the gorgeous pieces of custom art that I'm using to inspire the remaining decor in my home office space. Read on to see you how you can design and decorate your own beautiful room by starting the process with a gallery wall - you will soon see how this first step can create a focal point that anchors the room and makes decorating easy from that point forward!

Peruse the Minted Gallery
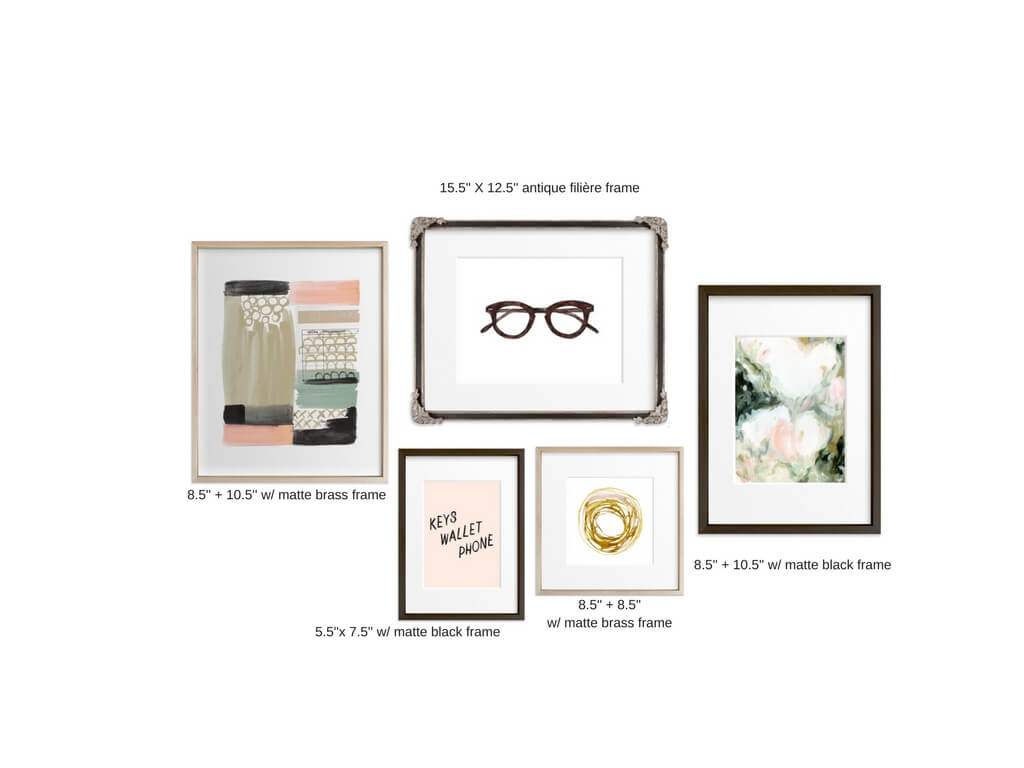
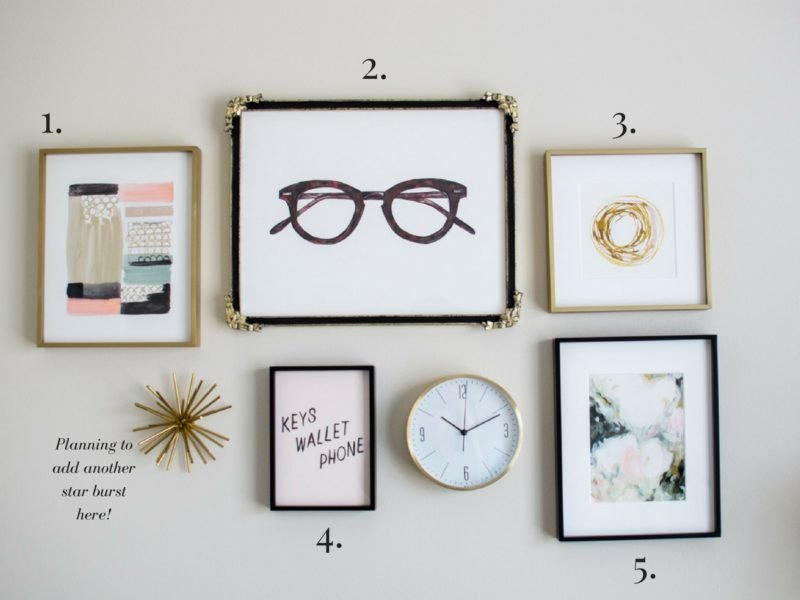
The first step in my decorating process was to choose art for my gallery wall - the fun part! I was completely astonished at the selection of art and customization options that Minted offers. I spent a good two hours browsing through all the amazing prints! I started with saving about 15 prints or so to my favorites list on the site and then narrowed it down from there. Below are affiliate links to the pieces I chose:
- Divided Art Print
- Lookin' Good Art Print
- Soma Art Print
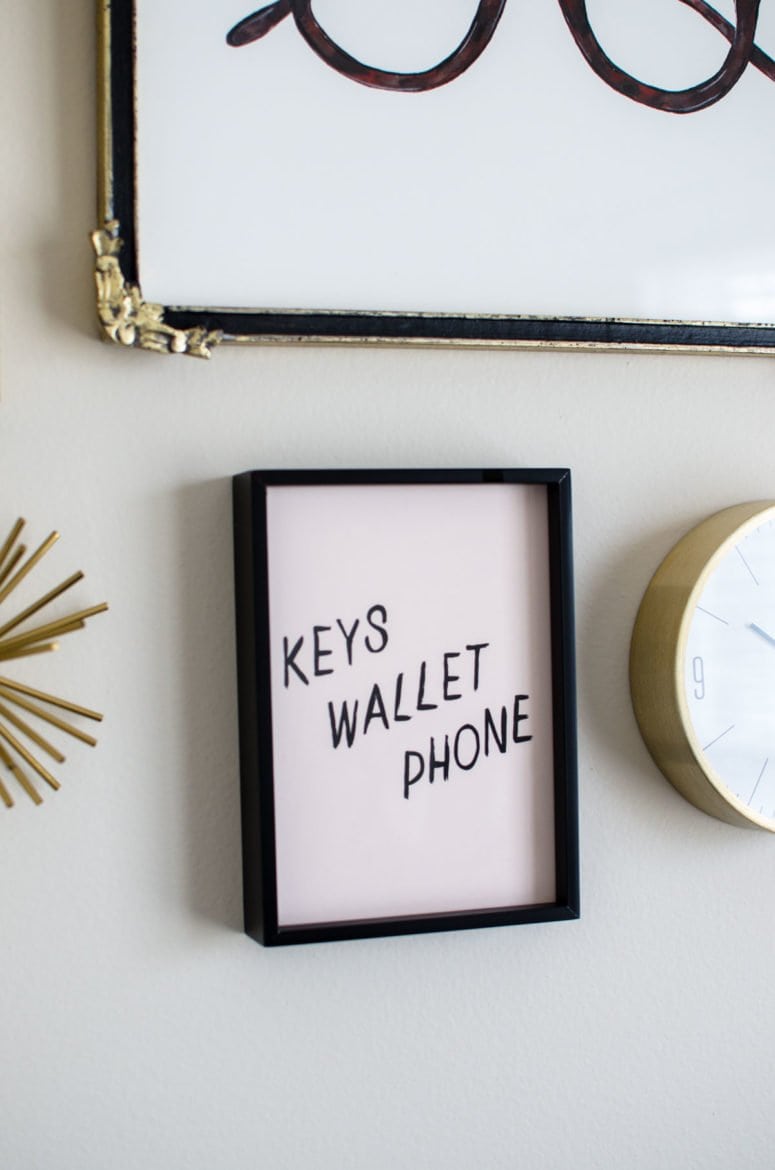
- A Helpful Reminder Art Print
- Mesmerize Art Print
**The gold clock and starburst are brass accent pieces I picked up at Target. I plan to add another starburst to the bottom left corner to even things but they only had one in stock when I visited!
Design a Mock-Up Gallery Wall With Canva
Another aspect of my selection process included creating a mock-up gallery with Canva. This was invaluable in helping me visualize what the different pieces of art would look like next to each other. Here are the steps I used to create my mock gallery:
- Select the presentation design option on Canva
- Upload screen shots of the art I chose and play around with different orientations for the gallery
- Add text to each piece of art describing the size I needed to order and the frame selection
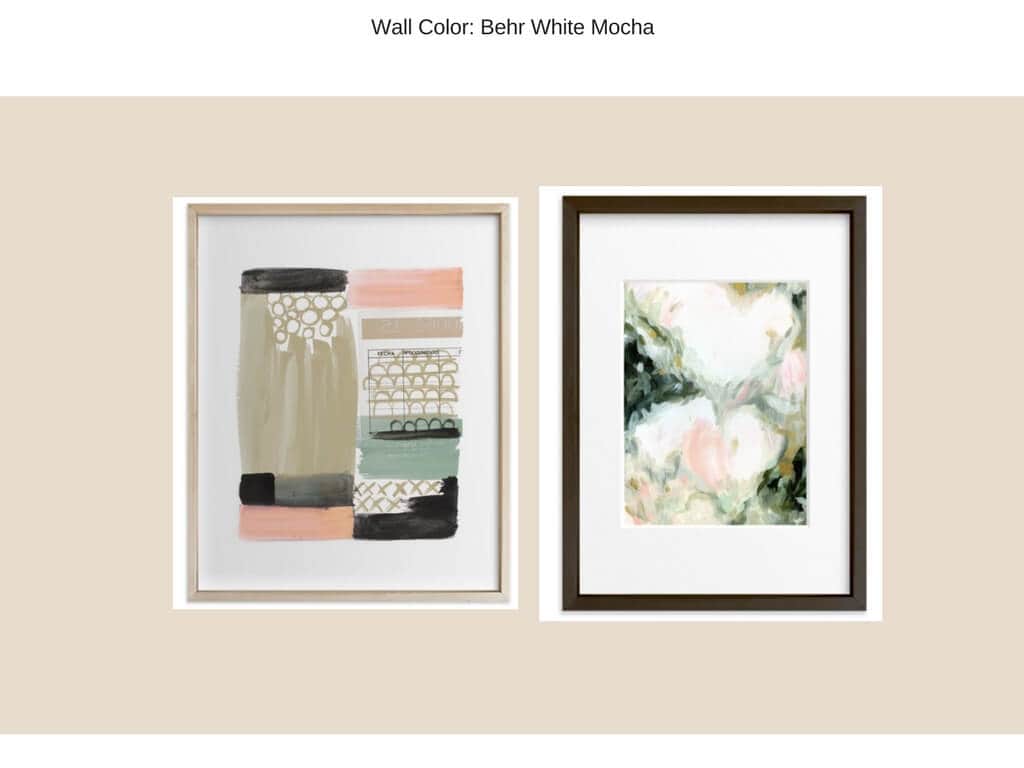
It really helped me to focus on a color theme when making my selection. For example, I knew I loved the color combo of blush + gold + black, and was inspired to choose two pieces with an accent of a seafoam bluish color. I kept my framing selection simple and sleek - choosing brushed brass frames, black wood frames, and a black + gold antique frame for the largest piece.
Pair Paint Colors to Your Art
Once I created a mock-up of my gallery, I added a second page to my Canva project and uploaded screenshots of various paint colors I was considering for the walls in my office. I used the paint color screenshots as backgrounds behind a few photos of the art to see how they looked together. The paint color I ended up choosing was Behr White Mocha - a soft, neutral cream. I love they way it looks with gold hardware/accents and black furniture. I also like to have neutral colors on the walls so that I can play around with different, bolder accent colors over the years.
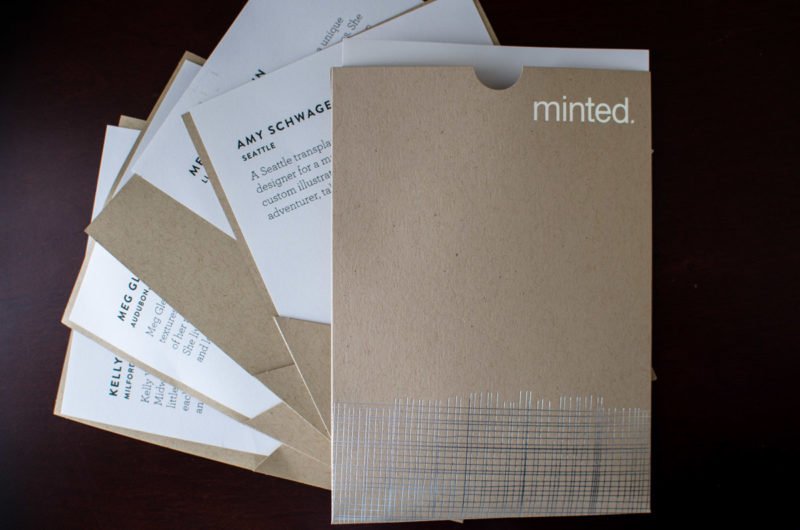
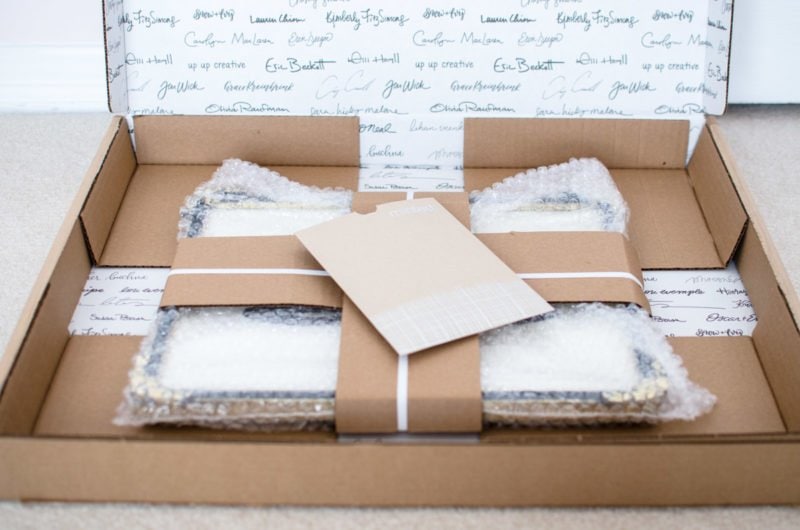
Once I ordered my prints, it only took them about a week to arrive! They were packaged in such a chic way and I love that each print came with its own card with a photo and information about the artist who designed the print. It was fun to know that there was a real person with real stories behind each piece and made the experience of receiving the art special and exciting.
Hang Your Gallery
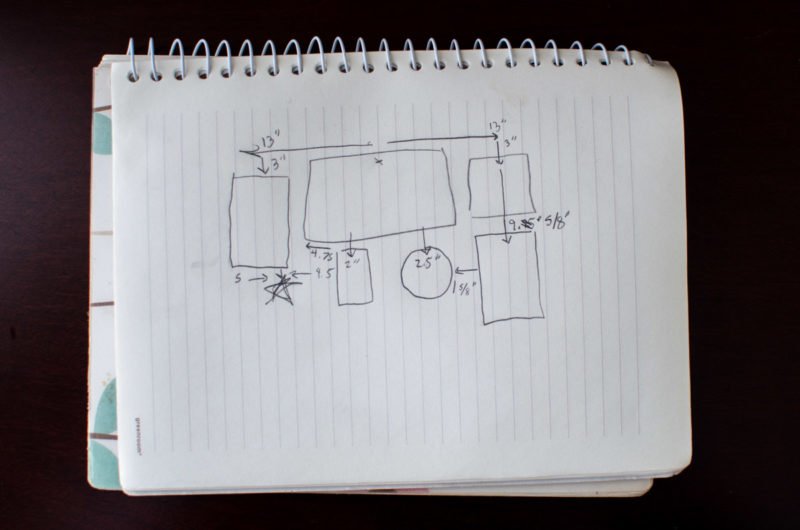
Ok, things have been smooth sailing up to this point, right??? Here's where things get slightly challenging - getting it all up on the wall. I'm just gonna put it out there - you're going to need to do a little math. Here are the steps I took to get my art on the wall - Ryan was recruited to help and kindly obliged, thankfully!
- Lay out the pieces for your gallery on the floor next to the wall you plan to hang them on. Space them out exactly how you intend for them to look on the wall.
- Sketch out a rough diagram of your gallery on paper.
- Use a tape measure to measure the total width and height of the pieces within your gallery. Divide those numbers in half to get a center point for the width and height (see example below). Record these numbers on your sketch.
- Next, measure the distances between each piece. Record this on your sketch.
- Use a tape measure and a pencil to mark the place on the wall where you want the top and bottom of your gallery to be.
- Start hanging your items from the top piece to the lowest hanging piece, then fill in the sides of the gallery using the pre-measured distances between each piece.
- Step back and adjust as needed!
Use a Canva Color Palette to Complete Your Decor
Now that my gallery wall is complete, I'm using it as an anchor for the room that will guide the rest of my decorating decisions for the room. I used Canva to make color swatches based on the colors in the art print below. I then downloaded this photo to my phone so I can carry it around and use it when I shop for decor! It's so easy to use this as an inspiration board to match pieces I'm considering to my color theme for the room. This helps you achieve a cohesive look in your space; with the focal point being your beautiful art gallery of course!

Below are a few pieces I'm considering purchasing for the office that has been matched to the color palette I created in the above photo. I hope this tutorial helps you move along in creating your own authentic and special place in a home! If you use any of these tips or would like to share your own design story, please share in the comments below!