
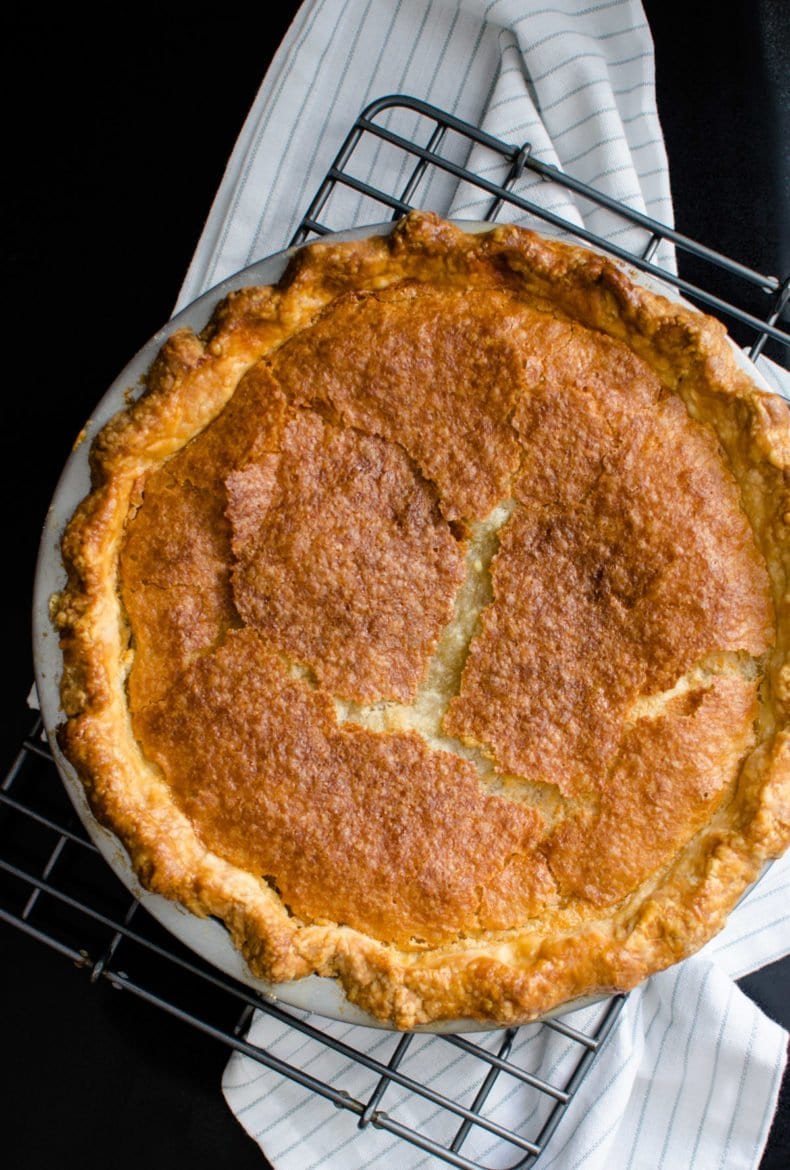
Come hang out with me in my kitchen - today we are going to make a pie from my Southern roots. Chess pie, to be exact! It is so buttery and tasty it will soon be one of your all-time favorites.
The weather is finally starting to cool off here in Columbia and I started getting all the fall feels. For me, fall feels manifest themselves in the following ways: apples, Ben and Jerry's pumpkin cheesecake ice cream, swapping out summer clothes for fall/winter items in the closet, and baking pies. Pies just feel fall-ish to me. It may have something to do with my notion that cooler weather makes it easier to make pies so the butter doesn't melt so quickly as you work it into the flour. That definitely happened when I had the not-so-great idea to bake pies on the Fourth of July!
Video
Here's a video for how I make a pie crust from scratch!
Pie-baking doesn't have to be intimidating. All you need to do adopt a few "standards of quality" and gain the cook's intuition of knowing what a good pie crust is suppose to look and feel like. All it takes to achieve that is a little practice! Below you will find my favorite tips for learning how to make pie dough from scratch - all learned from my own trial and error!
Ingredients
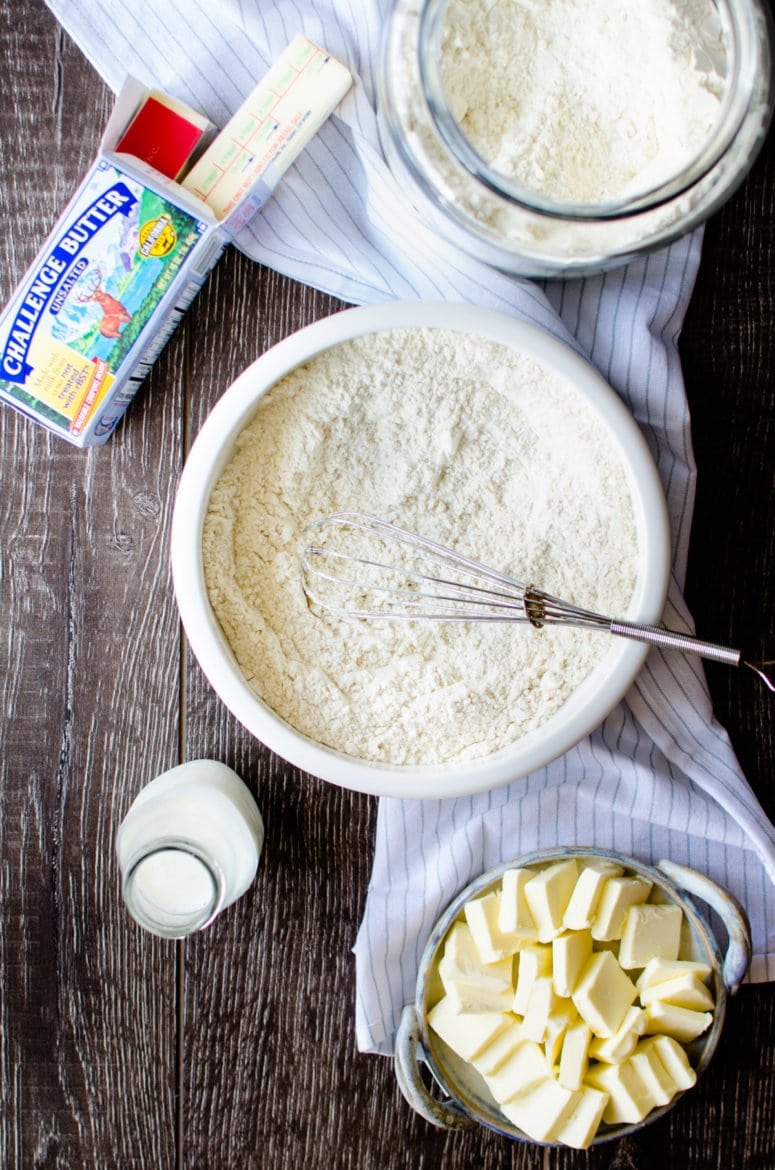
- Choose ingredients wisely. For me, the best pies result from using the best ingredients. Here are my go-to, non-negotiable pie baking ingredients:
- King Arthur All Purpose Flour - it tastes the best, and always has a consistent amount of protein in each bag (protein content is important in baking!)
- Good butter - I've actually done butter tastings before, and have found that Challenge butter (made in California) tastes the best and has the most creamy mouthfeel. My pie crusts are so much more flavorful when I use this butter; and flakier too!
- Buttermilk - I much prefer the taste/texture of adding buttermilk to pie crusts as opposed to the ice water + apple cider vinegar blend. I tend to find that the dough has a better texture and a nice tang to it.

2.Feel your way through the process. After lots of pie crust-making practice, I find it best to use my hands for working the butter into the flour. It's true, however, that you can use a food processor to accomplish this task more quickly. However, I find I'm better able to assess the texture of the dough if I feel my through as I work the butter in. It's kind of therapeutic, you know? Plus, in my mind, pie baking isn't anything you want to rush in the first place. It's a process that should be enjoyed!
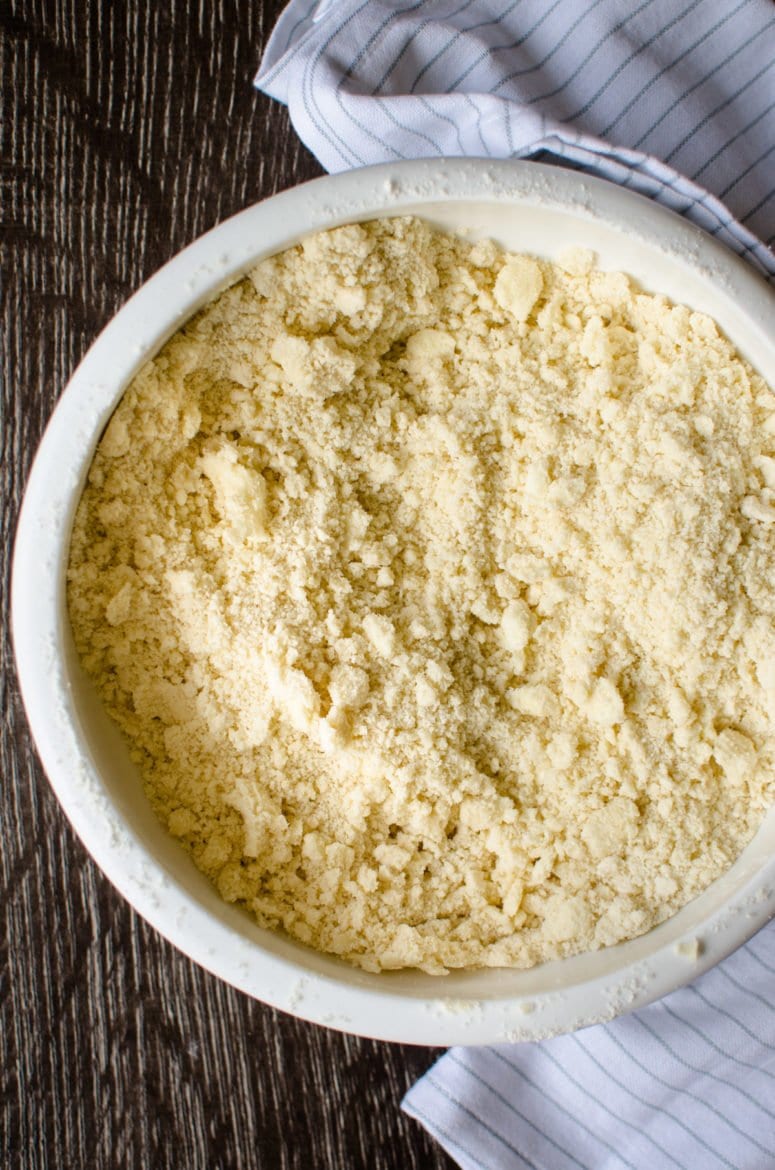
3. Chill out! After I've worked very cold butter into the flour, the mixture looks like the above photo. There's small bits of butter throughout the flour - some are the size of oatmeal flakes and some the size of peas. Next up - and this is my newly found secret - we place this butter flour mixture in the freezer along with pre-measured buttermilk for a good ten minutes. Keeping everything very cold will help the dough come together more quickly when you add the buttermilk and ensure that your bits of butter don't continue to melt into the dough. Melted butter bits = less flaky pie crust = not good!

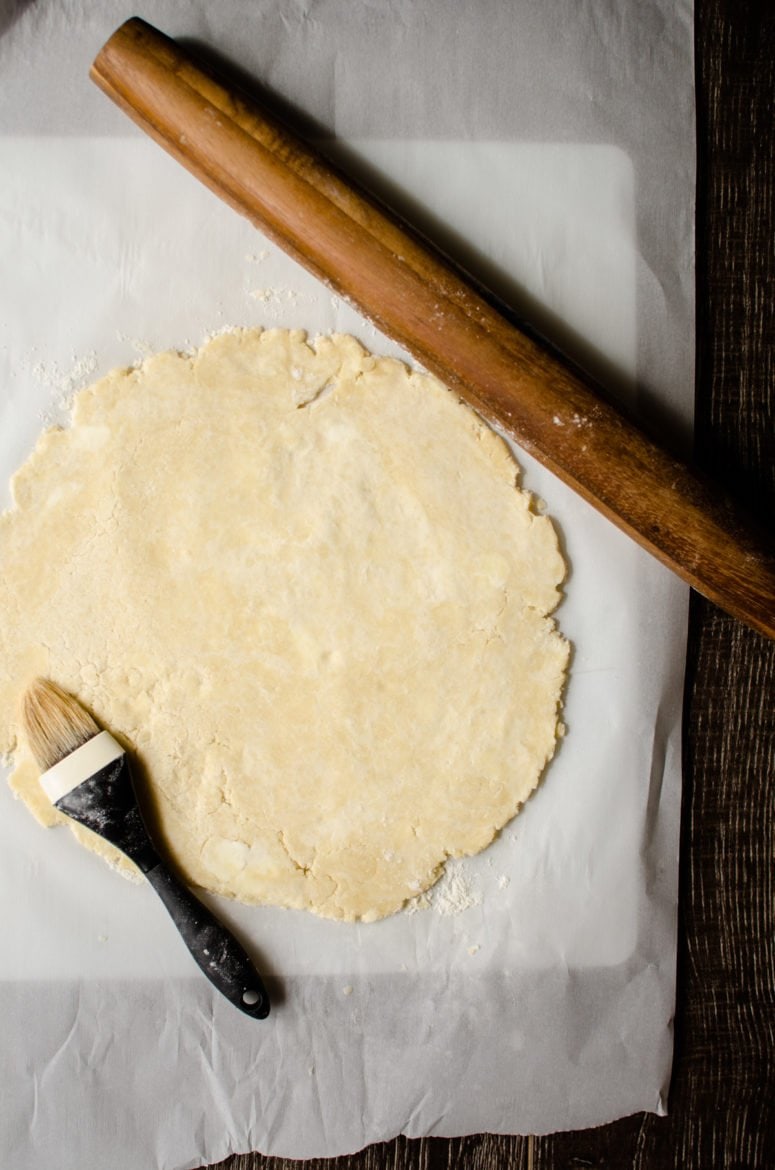
4. Roll the dough out on parchment paper. This way, you can place your pie pan on top of the rolled out crust, slide your hand underneath the parchment paper and - voila! - use the parchment paper to flip the crust into the dish without any tearing!
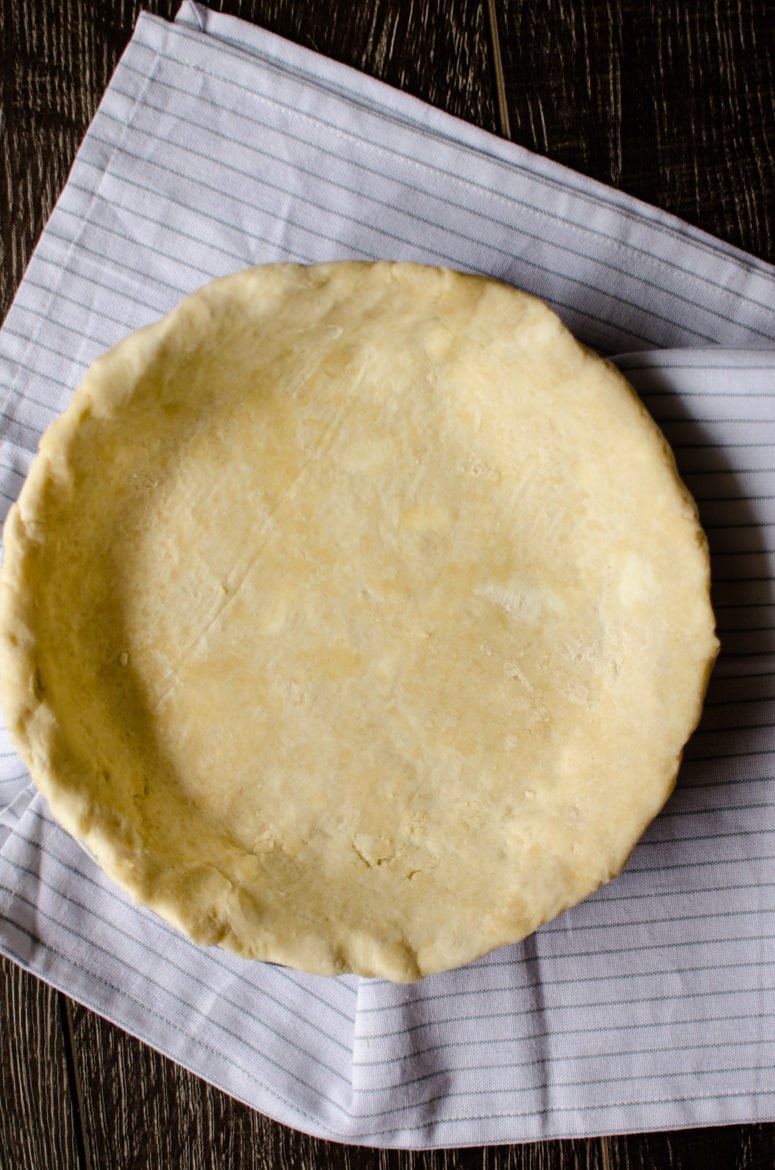
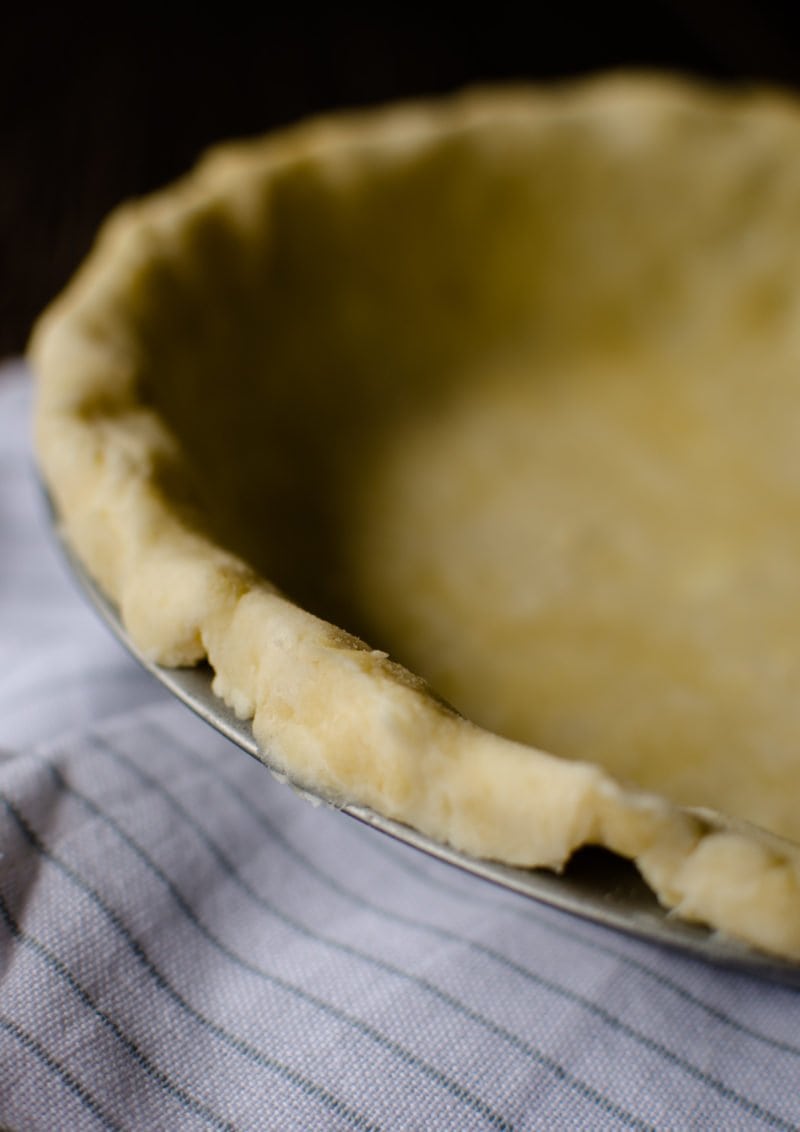
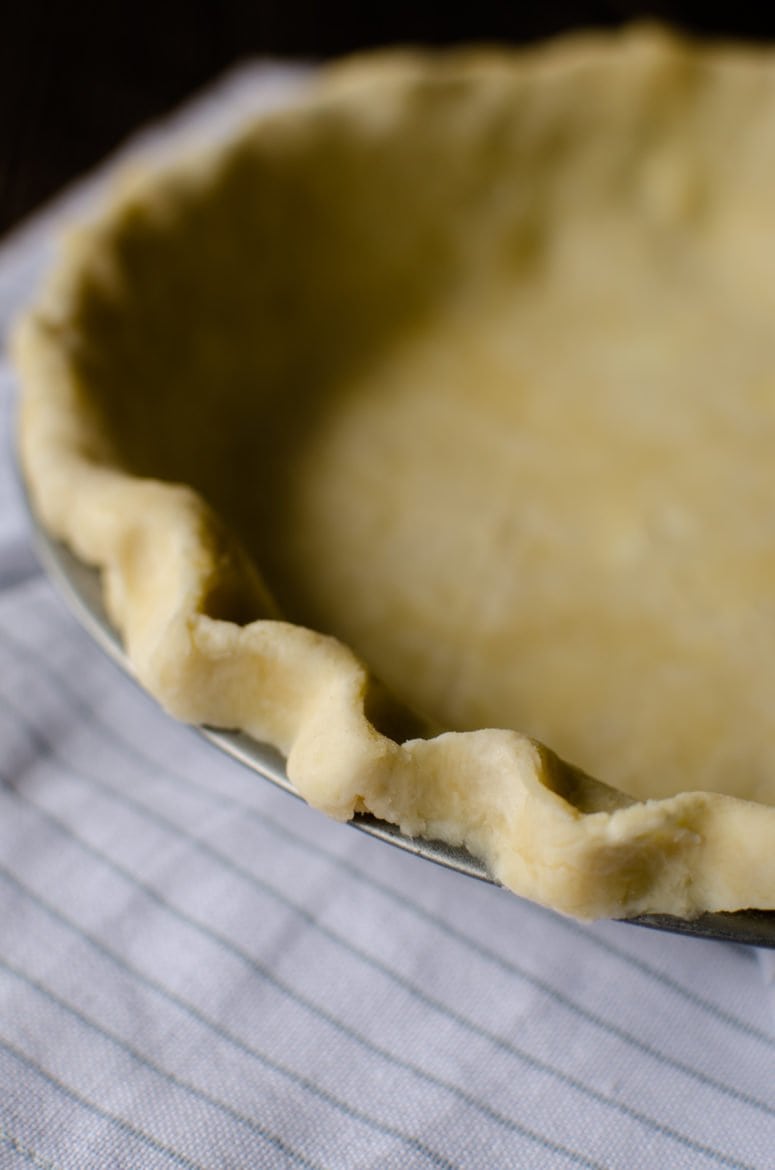
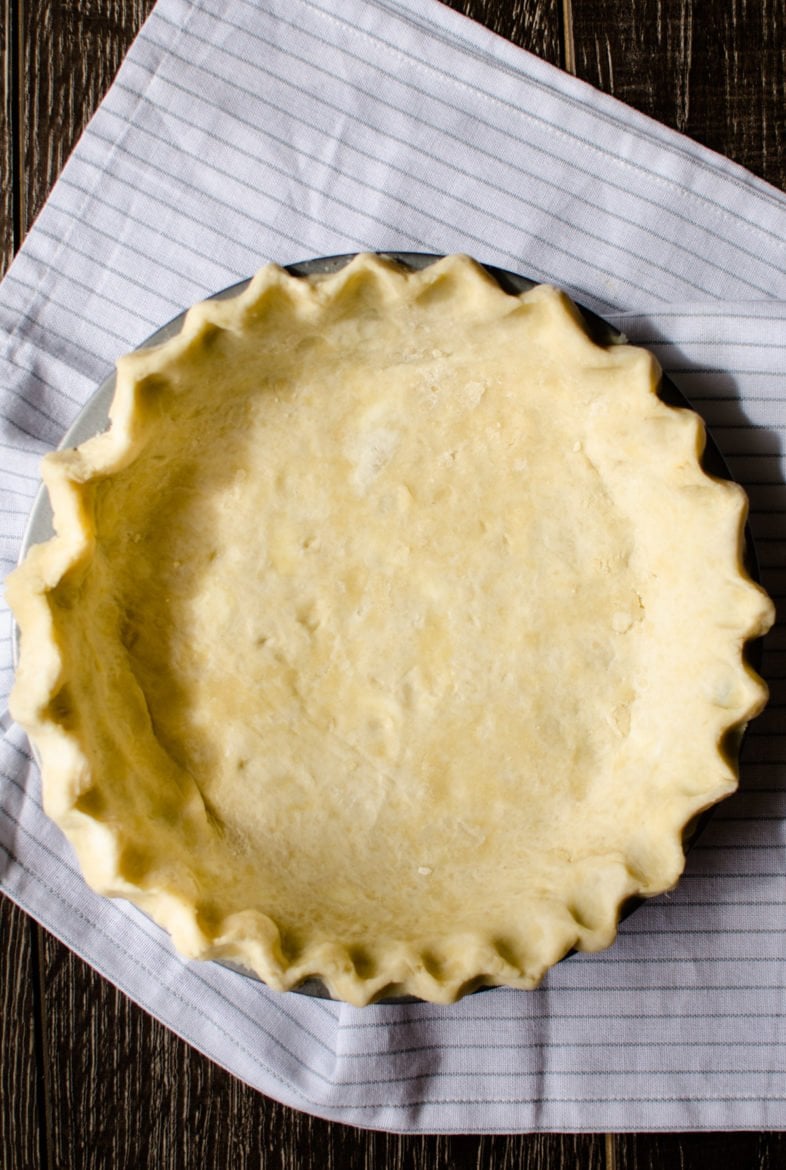
5. Tuck, don't trim! Many pie-baking tutorials will tell you to trim the edges of the crust before crimping the dough agains the rim of the pie pan. I have found, however, that when I tuck the overhang onto the top of the pan rim, I'm able to create a thicker, crimped crust that does not shrink when I bake it. The extra dough makes for a more dramatic and substantial crust that is WAY more photogenic 🙂 And then of course there's the egg wash - brushing a bit of beaten egg on the crust - to give it a nice, golden-brown sheen once it's baked.
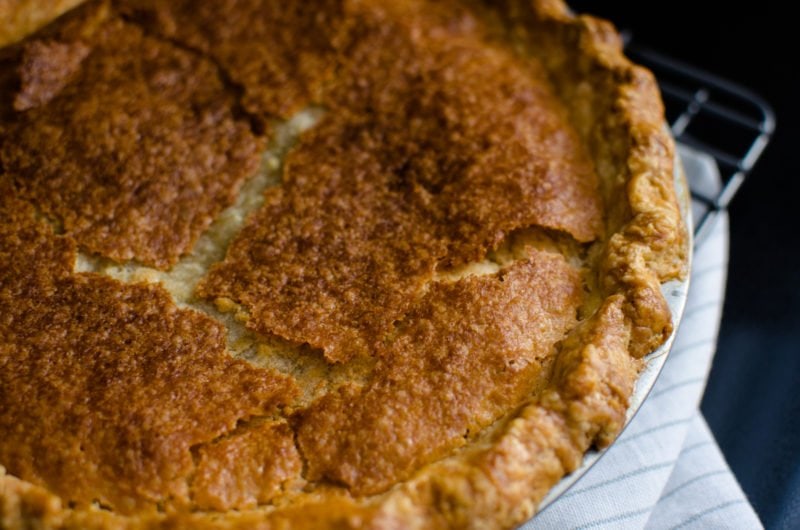
6. For beginners, Chess pie is the best pie! While you work on mastering the art of a good pie crust, I'd recommend keeping the filling simple. Fruit fillings and custard fillings cooked on the stovetop are divine but more time-intensive - certainly, try them at some point but promise me you'll try a chess pie first! This pie is steeped in Southern roots and is simplicity at it's finest. All you need = eggs + sugar + flour + salt + buttermilk + vanilla. Almost the same ingredients used in the pie crust! Chess pie filling is a rich, buttery, custardy-like situation that tastes divine warm, cold, or at room temperature. A cup of coffee served alongside is a must!
This recipe, in particular, was passed down to me from a dear friend's mother - here's to you and Nini, Patsy!
If you are a pie-lover like me, definitely check out the Strawberry Balsamic Pie, Peach Bellini Pie, and Mixed Berry Crumble Pie!
Did you make this buttermilk chess pie? If so, I'd love to hear how it turned out for you!
Leave a comment and rate the recipe below. This will help me with the creation of future recipes!
I’d also love to feature your creation in my weekly newsletter, so you can upload a photo to Instagram with the tag @sweetcayenne5 to be featured! Quick and easy recipe videos are available on my YouTube channel, and lots of menu inspiration on my Pinterest boards.
Recipe
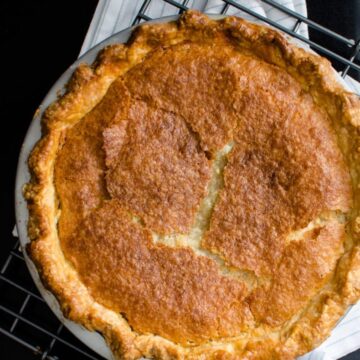
Old-Fashioned Chess Pie with a Buttermilk Pie Crust
Ingredients
For the pie crust (makes two 9-inch crusts)
- 2 ¼ cup all-purpose flour
- 1 tablespoon granulated sugar (use a heaping tablespoon)
- 1 teaspoon salt
- 16 tablespoons (2 sticks) cold unsalted butter, cut into ¼ thick squares
- ½ cup ice water (more or less as needed)
- 1 teaspoon white vinegar
- 1 whole egg
For the pie filling:
- 6 tablespoons unsalted butter melted and cooled
- 3 large eggs
- 2 cups granulated sugar
- 2 heaping tablespoons all-purpose flour
- ½ teaspoon salt
- ½ cup buttermilk
- 2 teaspoons vanilla extract use a good, high quality vanilla
Instructions
For the pie crust:
- In the bowl of a stand mixer, combine the flour, sugar, and salt. Place the mixer bowl and paddle attachment in the freezer for 20 minutes along with the butter cubes on a plate lined with wax paper.
- After 20 minutes of freezing, placing the mixer bowl on the stand mixer. Using the paddle attachment and low speed, add a few butter cubes at a time. Continue to do this ever 15 seconds or so until all the butter is added and has broken up into pieces that look similar to walnut halves.
- Mix the vinegar into the ice water. Create a well in the butter and flour mixture and pour in ⅓ cup of ice water. Mix on low for a few seconds. Add the additional water as needed (you'll use about ½ cup tota) until you can smoosh some dough together with your fingers and it breaks into large chunks.
- Transfer the dough mixture to a lightly floured surface. Use your hands to gently form the dough into one mound - it will look crumbly but will come together as it rests! Divide the dough mound into two disks and wrap each in a sheet of plastic wrap. Place one in the refrigerator for one hour and freeze the other for the next time a pie craving hits! While your dough chills, place a 9’’ pie dish in the refrigerator to chill.
- After an hour (or longer), remove your pie dough from the refrigerator. Place on a well-floured sheet of parchment paper. Using a floured rolling pin, carefully roll the dough out into an 11’’ circle. Use a pastry brush to remove any excess flour from the dough once it is rolled out. Place your pie dish on top of the circle, then carefully use the parchment to flip the dough into the pie dish. Tuck the overhang of the pie dough up and under the dough that is on the edge of your pie pan see photo above). This will make a fuller crust. Crimp the dough in a shape of your liking and place the pan in the refrigerator while you make the pie filling.
For the pie filling:
- Preheat the oven to 350°F.
- Melt the butter over medium heat. Remove from heat and set aside to cool for several minutes.
- In a large bowl, combine the eggs, sugar, flour, and salt by stirring with a whisk. The mixture will be very thick. Whisk in the butter until just combined. Add the buttermilk and vanilla, whisking until just combined and the mixture is smooth.
- Remove the prepare pie crust from the refrigerator. Pour the filling into the crust. Use a pastry brush to lightly brush the edges of the pie crust with a lightly beaten egg.
- Place the pie on baking sheet and put it on a rack in the center of the oven. Bake for 50-70 minutes until the filling is set - you will know it’s done when it barely jiggles in the center. After 50 minutes, you may want to add a pie ring or aluminum foil strips around the edge of your crust to keep it from turning too brown.
- Remove the pie from the oven and allow it to cool in the dish for an hour or two before serving. It’s delicious served warm, room temperature, or chilled!
Shop my pie-baking essentials:
B says
Finally found what I have been looking for.
Over a year has passed of trying different recipes and I finally have the recipe I wanted.
Made this and chilled overnight. So good. Will be making this many times again.
Whitney Reist says
Hi B! Thanks so much for stopping by. I'm thrilled you enjoyed the recipe - it's a favorite of mine as well and I can't wait to make it again for Thanksgiving!