Can we just take a minute to acknowledge the amazing, wonderful, deliciousness that are holiday cookies??? Or maybe I'll just dedicate a whole blog post to their awesomeness. We're totally doing this. Here it goes:
When it comes to selecting holiday cookies to bake, their are four in particular that end up on my list year after year. I only make these types of cookies once per year - during the Christmas holiday season. I feel like if I give them their own time and place to made and enjoyed, they will continue to seem extra special to me and taste extra good. This is a good strategy! Not only because of the latter reasons, but also because these particular confections take a little time, effort, and attention to make. That's not a bad thing necessarily - the extra effort usually ends up making me admire and enjoy these cookies even more! Do you have recipes you feel that way about???
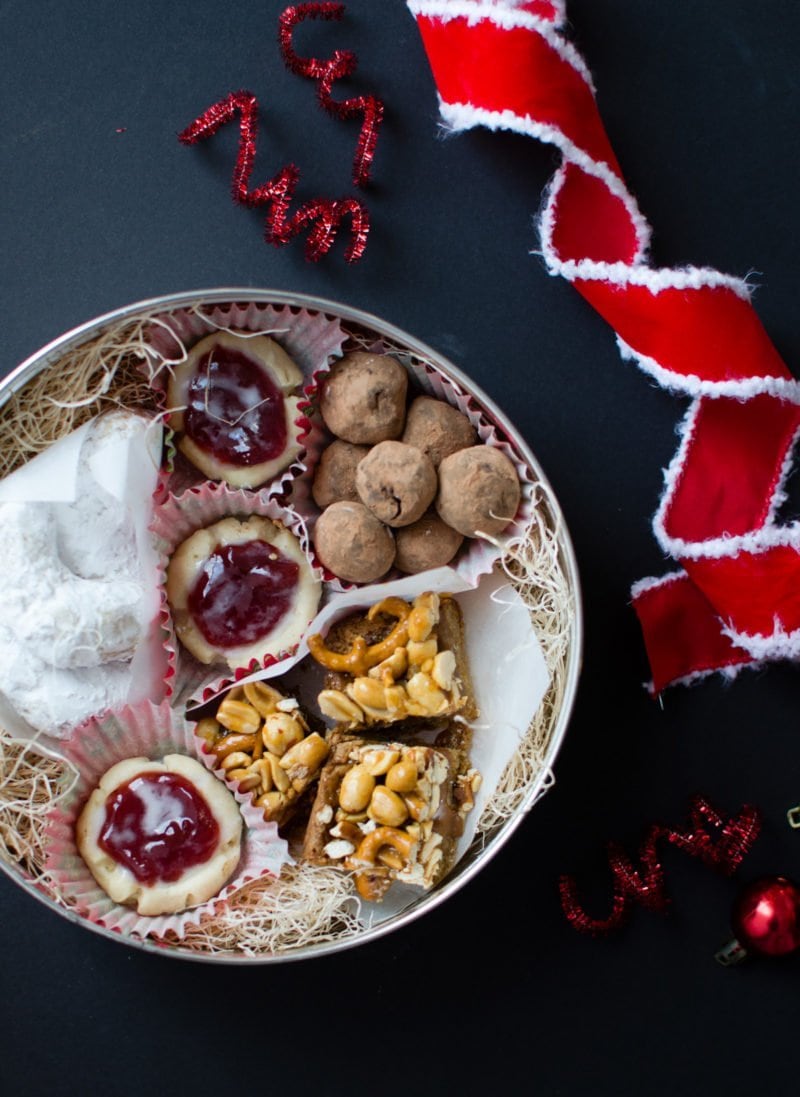
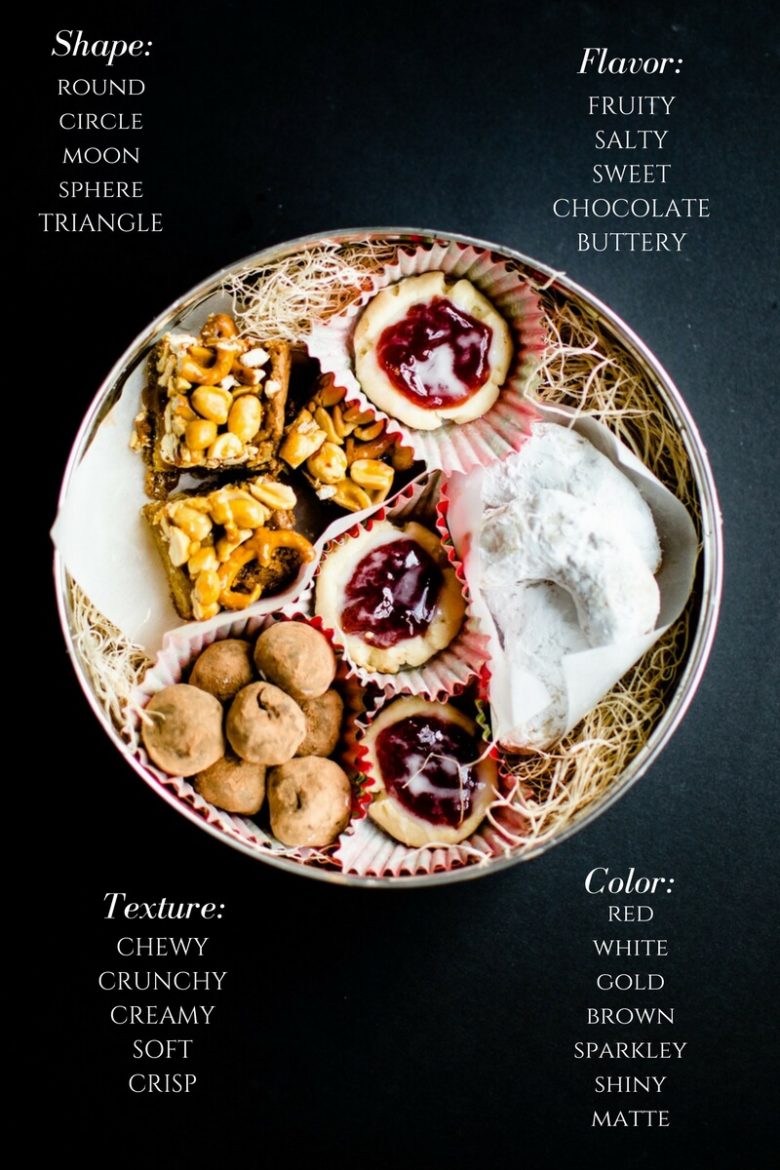
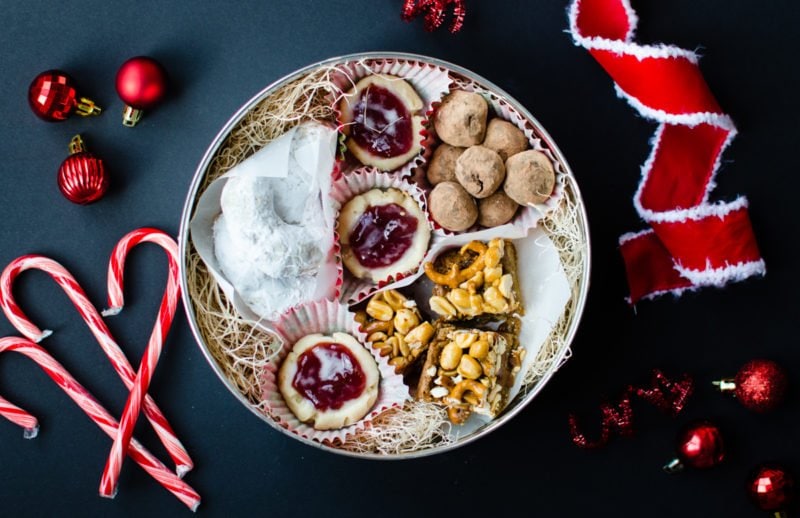
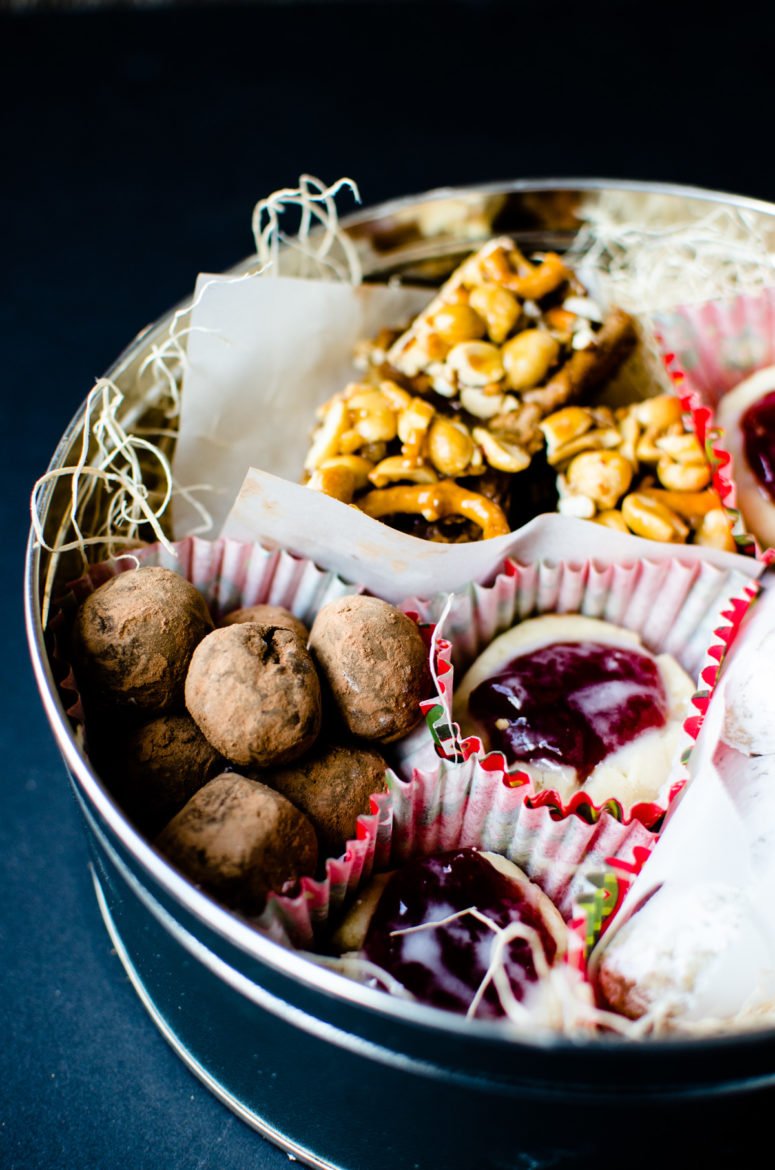
When it comes to making a cookie recipe selection for a holiday platter or tin for gifting, I've developed a strategy over the years that determines the types of cookies I choose. To make a well-rounded cookie tin/platter, it's nice to choose recipes that are different from each other with regards to shape, flavor, texture, and color. I've found that the most satisfying selection for my personal taste includes the following:
- Butterscotch Blondie Bars with Peanut Pretzel Caramel - I've always loved truffles, and this recipe is great because you can change up the flavor/coating a bit year after year. This year I flavored the truffles with some instant espresso powder and coated them in a simple dusting of cocoa powder. The intensity of the dark chocolate is a nice addition in the midst of buttery, sugary flavor that is characteristic of the other cookies.
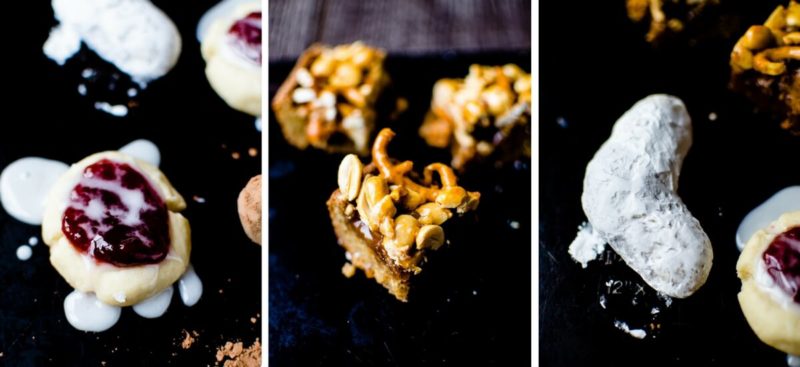
- Butterscotch Blondie Bars with Peanut Pretzel Caramel - the recipe and I have a love/hate relationship. If I had to name a favorite cookie bar of all time, for me, this would be it. These.bars.are.AWESOME. But they are tricky to make - the caramel situation is a little scary, and takes way longer than the recipe claims to get it just right (12-15 minutes is more like 45-50 minutes for the caramel part). This is the most involved cookie recipe on my list, but SO worth it in the end!
- Almond Snowballs via Southern Living - in my opinion, a Christmas cookie tin is not complete without a confection that will send a sprinkling of "snow" all over the place when you take a first bite. The recipe for these butter nuggets calls for shaping them into balls, however, to allow for more variety of shape in my selection, I like to shape them into crescents/moons!
- Raspberry Thumbprints via my Mom (recipe can be found at the bottom of post) - these little jewels have graced my family's dessert table for as long as I can remember, and the tradition must be carried on! It's nice to have a bit of fruit flavor on your cookie platter, and these are always so well received by anyone I gift them to.
And there you have it, my friends. Give a little attention to shape, texture, color, and flavor when selecting your cookie recipes and you too can have a balanced and beautiful selection to make platters and tins from all season long! What cookies are gracing your palate with their presence this year? Let me know in the comments below - I might just have to give yours a try!
More holiday goodness can be found on my Christmas page. There is a Thanksgiving page as well.
Now if you like what you see, sign up for my weekly newsletter, follow me on Instagram, Twitter, or YouTube. I hope all of your holidays are memorable!
Baking Essentials: My Tips for Creating an Epic Christmas Cookie Tin!
Ingredients
For the cookies:
- ¾ cup unsalted butter 1 ½ sticks, softened to room temperature
- 2 cups of all purpose flour
- 3 tablespoons granulated sugar
- ½ teaspoon salt
For the filling:
- ¾ cup raspberry jam or any flavor you prefer
For the glaze:
- ¾ cup powdered sugar
- 1-2 tablespoons milk
Instructions
- Preheat oven to 350 degrees F. Line 1-2 baking sheets with parchment paper and set aside.
- In the bowl of a stand mixer fitted with the paddle attachment, combine the butter, flour, sugar, and salt on medium low speed until a soft ball forms.
- Shape the dough into balls about ¾’’ in diameter and place the balls 1’’ apart from each other on the baking sheet. Use your thumb to place a thumbprint in the center of each dough ball.
- Bake the cookies for 8-10 minutes or until just set. They should be a pale golden color when finished - be careful not to overbake.
- Remove the cookies from the oven and cool for 2 minutes. Press your thumb into the center of each a second time before transferring cookies to a wire rack to cool completely.
- Fill the center of each cookie with about ½ teaspoon of jam.
- Combine the powdered sugar and 1-2 tablespoons of milk until a glaze forms - it should be the consistency of honey.
- Use a fork to drizzle the glaze over the tops of cookies in a swift back and forth motion. Let dry for 10-15 minutes before serving.
- Cookies may be stored before filling in an airtight container for up to 3 days or in the freezer for up to 3 months. Simply take out the number you need and fill/glaze them right before serving.

Comments
No Comments