Today I'm giving you a play-by-play of my first few attempts at using an Instant Pot!

Let's just say it - as a food blogger, I am WAY late to the game when it comes to the craze surrounding the Instant Pot. And why is that? Well, to be honest, it took me a long time to decide if I really needed one. I am just cooking for two, and already had an arsenal of easy-prep meals I could make in my slow cooker or Dutch oven that are similar to what the Instant Pot can produce. I also am pretty low on storage space in my kitchen and knew that the Instant Pot is a pretty large device that would take up a good chunk of a cabinet or closet space.
So why did I finally cave and get one? All in the name of "research" my friends! At this point, I have clients and readers who are asking about it, so I want to be "in the know" with my own personal experience so that I can give solid advice. I also wanted to see if it would be a good tool for certain family members of mine who aren't too fond of cooking and want to streamline their meal prep. So I ordered one for myself and one for my sister, and we spent a week together trying out different recipes to see what the hype was all about. Keep reading for our first impressions and take the fun quiz at the bottom of the post see if you should get an Instant Pot!
Our Instant Pot Test Run Recipes
- Instant Pot Sausage and Herb White Bean Soup from Table for Two - in the name of Frugal February, I chose this soup as my first recipe made in the Instant Pot because I had all of the ingredients on hand and it was inexpensive to make. I also wanted to make a lot of soup so I'd have extra for the freezer!
- Recipe modifications - I used uncooked Italian sausage instead of cooked and just added extra time for browning.
- Pros - it was really easy to prep all of the ingredients, brown the sausage in the Instant Pot using the "saute" function, and then just add everything else in to pressure cook.
- Cons - the beans were not done at the end of the 40 minute cooking time. They were still pretty crunchy, so I had to add an extra 15 minutes of pressure cooking. This ended up being an extra 40 minutes total since the pot had to come to pressure again and then natural release pressure at the end. I'll just say, we were pretty hungry by the time the soup was finally done!
- Instant Pot Shredded Chicken from My Heart Beets - Next, I figured shredded chicken would be a good "basic" function to master in the IP, plus I had seen the advertisements all over Pinterest for 15 Minute Instant Pot Chicken.
- Recipe modifications - I only cooked 2 pounds of chicken instead of 4, and reduced the cooking time from 20 minutes to 15 minutes as the blogger suggested. I also used taco seasoning to give my chicken a Southwest flavor. I also added a 10-minute natural pressure release at the end instead of the forced quick release pressure that was recommended, primarily because I had read that meats will be juicier if you let the pressure release a bit before forcing it out.
- Pros - the chicken turned out to be perfectly cooked and was very easy to shred. I loved the flavor and tenderness!
- Cons - none really, however, it did take about 10 minutes for the pot to come to pressure before the 15 minute cook time. So I'd say it's more like 30-minute shredded chicken!
- Instant Pot Fried Rice from Happy Foods Tube - my sister is adopting a little boy from Thailand, so we wanted to practice making recipes in the Instant Pot that he would enjoy once he arrives! We figured Fried Rice would be a good weeknight staple for her to master for her weekly meal plans.
- Recipe Modifications - we added 1 pound of diced (about ½'' pieces) chicken breast to the pot along with the other ingredients. We also substituted shelled edamame for the green peas. I also made a flavored soy sauce mixture to drizzle on the fried rice before serving for added flavor.
- Pros - after the recommended 3 minute pressure cook time, the rice was still very crunchy. So we added an extra 2 minutes of cooking time. The addition of chicken was fine and the chicken was cooked through since the pieces were so small.
- Cons - the rice had a very soft, sticky texture that I did not care for. However, my sister prefers a softer rice texture, so she and her husband really enjoyed the finished recipe.
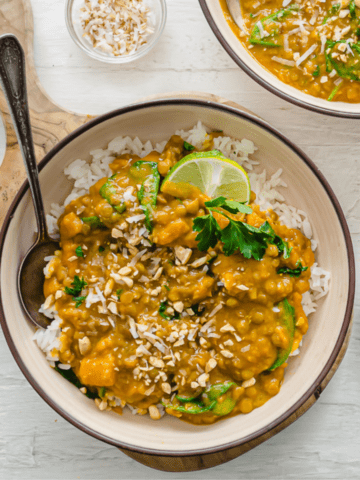
- Instant Pot Thai Butternut Squash Soup from Kylee Cooks - my sister LOVES butternut squash soup and this Thai-flavored version seemed to be a perfect fit for their soon-to-be family of 3!
- Recipe modifications - we only modified the recipe with seasonings we added once the soup was cooked. I will be posting my modified soup version to the blog soon because we liked it so much!
- Pros - this soup recipe was VERY easy to make and turned out just how we expected using the "Soup" setting on "normal," which takes 30 minutes of cook time.
- Cons - none!
- Instant Pot Korean Beef Tacos from Pinch Of Yum- we LOVE Asian-fusion flavors wrapped up in a taco, so everyone was very excited to try this recipe.
- Recipe modifications - I used a 2-pound chuck roast from the freezer instead of the sirloin the recipe calls for because it is what I had on hand. I also used ¾ teaspoon ground ginger instead of fresh, homemade pear butter (no sugar added) instead of canned pear, reduced the soy sauce and brown sugar from ½ cup to ⅓ cup, added 1 tablespoon of Korean chili paste for a spicy kick, and added ¼ cup of water.
- Pros - the meat was so tender and very easy to shred - we LOVED the flavor!
- Cons - none; although next time I will double the recipe so I have extra shredded beef to freeze for later!
First Impression Take-Aways
- Read the ENTIRE instruction manual before using the Instant Pot - it is not exactly an intuitive appliance to use, so it's worth it to take 30 minutes or so to know what you are getting into.
- Try a few low-cost, low-risk recipes first - there's a high likelihood that the first few recipes you try will need adjusting before you make them again, so make something that uses inexpensive ingredients and give yourself extra time to make the recipe in case you need to add on cooking time.
- Don't be intimidated by all of the buttons - you likely will not be using them all! In fact, 4 out of the 5 recipes I listed above used the manual pressure cooking settings instead of a preset function, and I am finding that to be the case the more research I do into cooking times.
- Don't expect a recipe to be perfect on the first try - this needs to be repeated again and again! You are essentially learning a new cooking technique, and despite the Instant Pot being advertised as a way to make a perfect easy meal very quickly, the practice still makes perfect in the case of pressure cooking!
- Always add in time for the pot to come to pressure and to depressurize - don't be fooled by the claims of a "10-minute dinner" or "5-minute breakfast." Although the Instant Pot cooks most things 3-4 times faster than a slow cooker, you still need to add time at the beginning for the pot to come to pressure, time at the end for depressurizing, and then keep in mind that your food may need extra time to cook if it's the first time you are trying a recipe.
- Clean the sealing ring properly - I have read that the rubber sealing ring can quickly take on the flavor of spices and meats if you do not clean it properly after each use. This is why some Instant Pot users recommend purchasing an extra sealing ring so that you can use one for sweet or neutral-flavored dishes (like applesauce and oatmeal) and a second for savory foods.
In summary, I think that the Instant Pot will be a great tool that will help me make large portions of food in 1-2 hours that I can separate into meal-prep portions or freeze for later. I'm excited to keep working with it and plan to start putting recipes I develop for it on the blog very soon! In the meantime, share your Instant Pot stories with me in the comments below or check out my new "Kitchen" shop page where you can shop all of my favorite kitchen essentials!
To find out if you should buy an Instant Pot, take my fun and short quiz below!