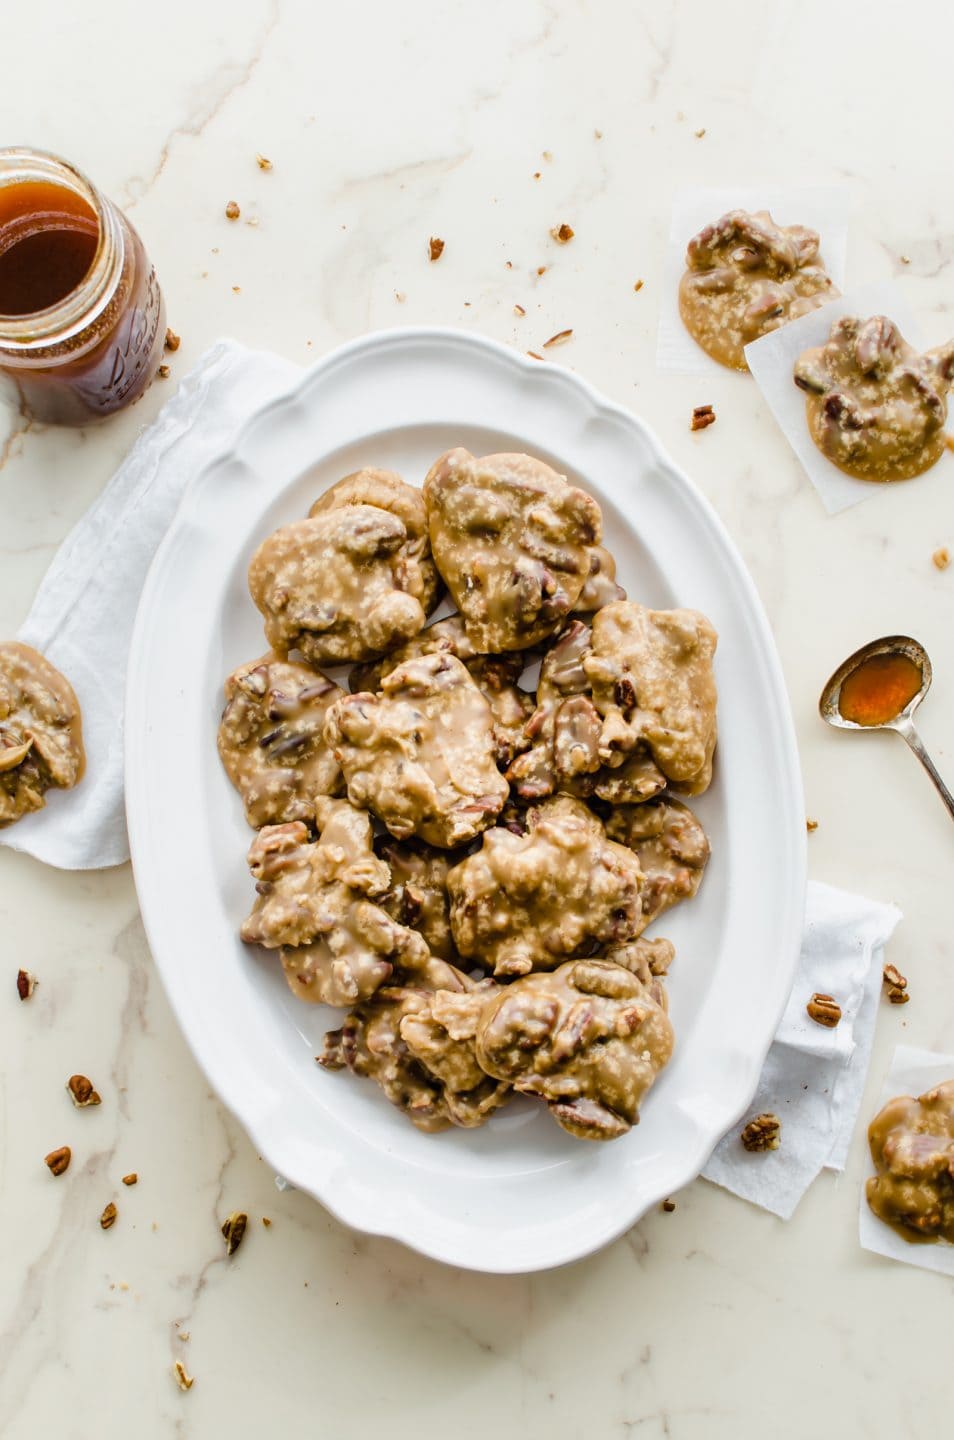
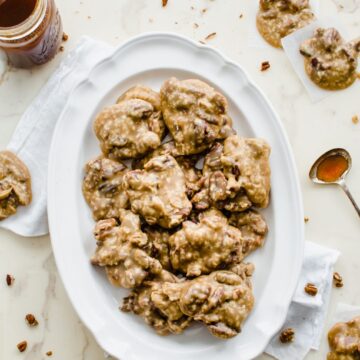
These creamy Boiled Cider Pecan Pralines are a soft, tender praline candy filled with toasted pecans and laced with the flavor of boiled apple cider.
Today I'm so excited to be sharing a recipe inspired by my mom and dad's all-time favorite candy: New Orleans pralines - or PRAH-lines, as they say in Nawlins'.
I've been enjoying pralines with them since I was a kid, and even remember a care package they sent me in school once with pralines from a visit they had made to New Orleans! Their love for pralines runs deep - there was a sweet lady in our church years ago who used to make them for our family all of the time (hi, Mrs. Betsy!).
Here are some specifics about what I wanted in my pralines:
- Creamy color and texture - after comparing lots of recipes and pictures of pralines, I decided I wanted mine to be the creamy kind of praline that utilizes heavy whipping cream. Some recipes call for evaporated milk, but I wanted a bit richer of a texture.
- Toasted pecans - I know, traditional New Orlean's pralines do not use toasted pecans. However, I don't like the flavor of raw pecans, so I toasted them to deepen the flavor and give them a slightly crunchier texture.
- Slightly tangy flavor - some praline recipes call for buttermilk, and I like the idea of having tangy flavor notes to contrast with the sweetness of the praline. I decided to add boiled cider syrup to this recipe to give that subtle but balancing tang.
- Depth of flavor - for these pralines, I decided to use a mixture of brown and white sugar so that the pralines had a rich color and depth of flavor.
Now that you have all the sweet details, let's make some pralines!
Ingredients
- Pecan halves - buy them as fresh as you possibly can!
- White and brown sugar - you can use dark or light brown sugar for this recipe.
- Salted butter - this is what I prefer for cooking and baking.
- Half and half + heavy cream - for creaminess and texture. I have not tested this recipe with other types/ratios of milk, so I can't speak to whether or not substitutions will work.
- Boiled cider syrup - a splash of this gives a slight apple flavor and tanginess to the praline. If you don't have any on hand and don't want to make it, substitute with vanilla extract to add flavor.
- Candy thermometer - this is necessary for knowing when your candy mixture is done and ensuring the candy will set properly.
- Heavy-bottomed saucepan - this is necessary so that the bottom of the mixture cooks evenly and doesn't scorch while boiling. You want a pan that has some heft and cooks evenly up the sides. I love how reliable my 3-quart saucepan from All-Clad is when I make any type of caramel or candy.
Ingredient amounts/instructions listed in the recipe below.
Instructions
Toast the pecans - the pecans will get lightly toasted for 7-8 minutes before you proceed with the recipe. Once toasted, have them on hand nearby in a bowl.
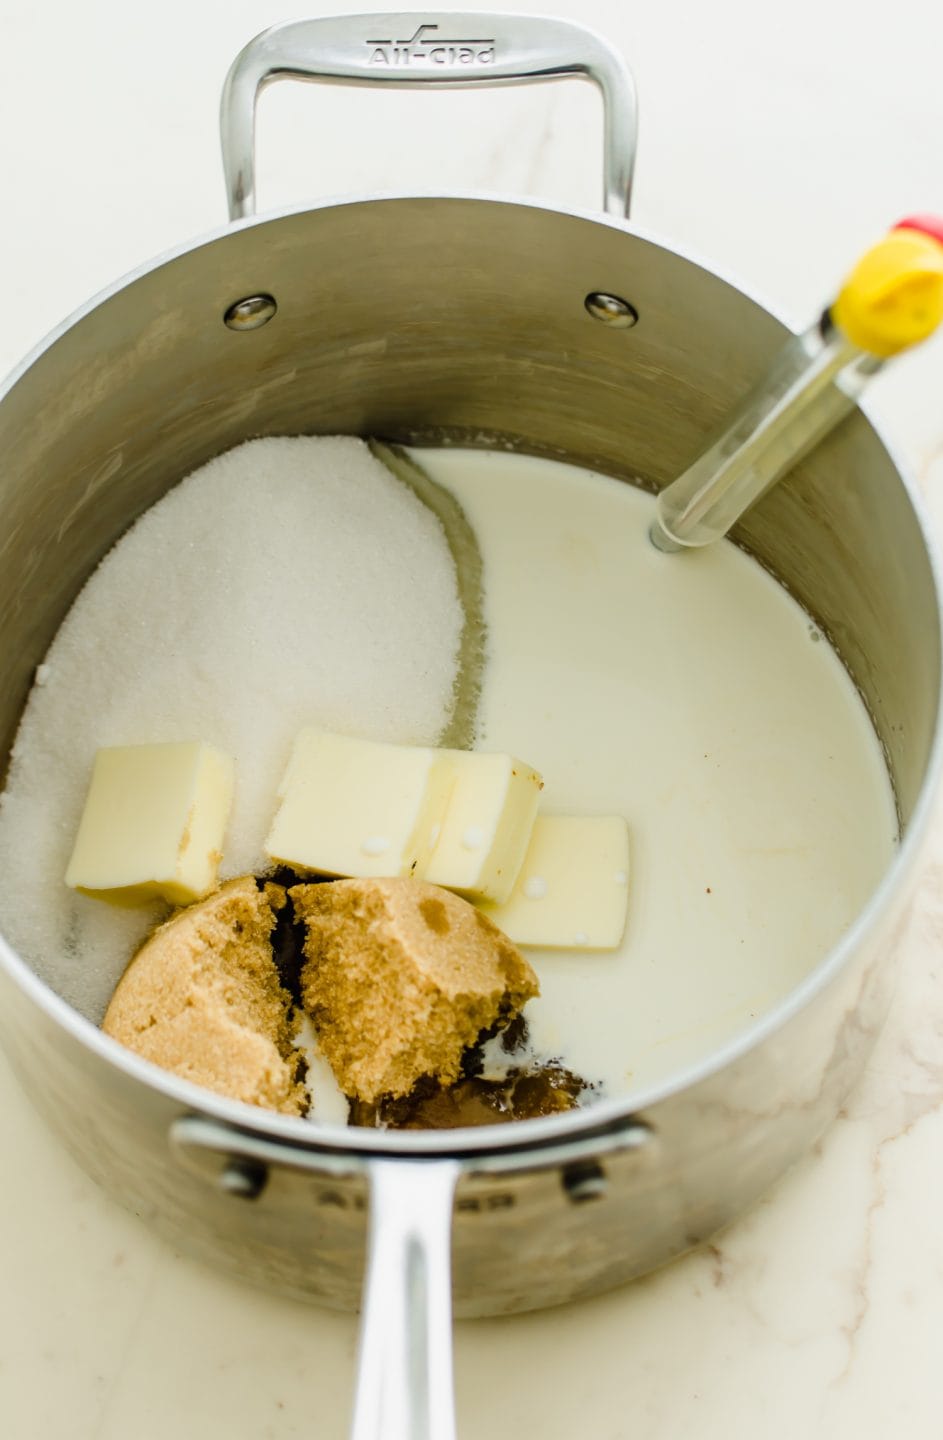
Melt the sugars, butter, and creams - do this over medium heat, stirring often.
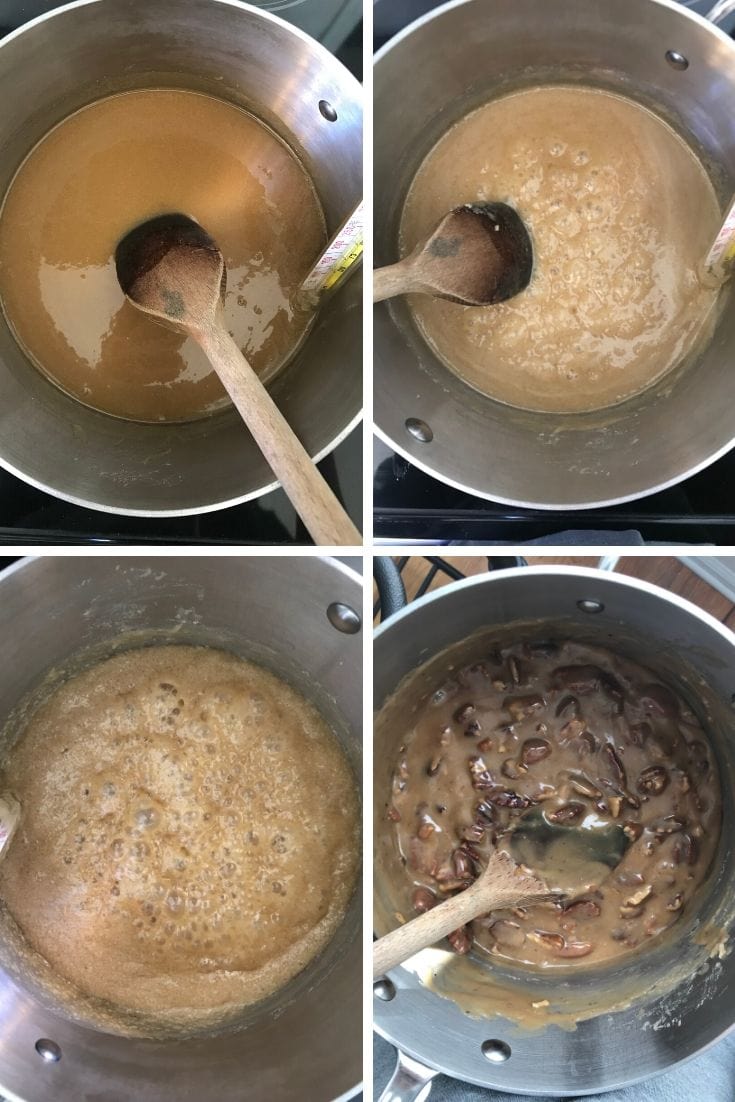
Boil the mixture - the mixture will start to simmer at first and boil slowly. You can stir throughout this process, but once it starts to boil rapidly (see the picture in the bottom left corner below), stop stirring! At this point, you will let the mixture boil rapidly for 2-4 minutes until it reaches the soft ball stage indicated on the candy thermometer, which is between 236 and 240 degrees F. I take my candy mixture off the heat when it's between that range.
Add the cider syrup - you will stir in the cider syrup off the heat, then let the mixture rest for 2 minutes.
Add the pecans and stir - the mixture will still be very hot, so be careful! You will stir thoroughly for 2 minutes to thicken up the candy mixture - it will turn a paler color that resembles peanut butter. The picture in the bottom right corner below is what the mixture looks like just before the stirring begins.
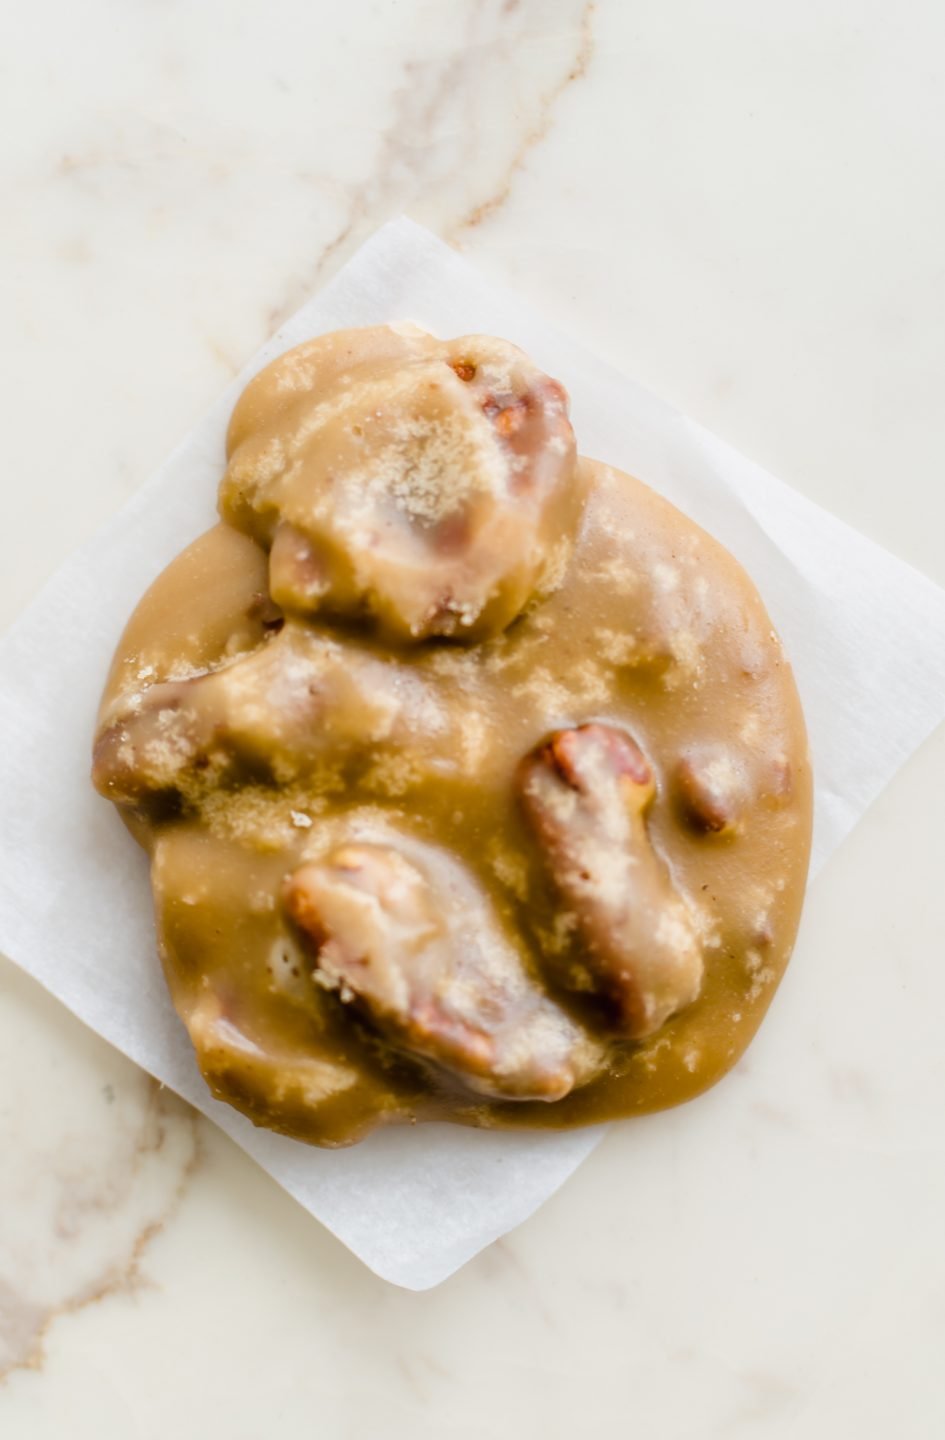
Drop mounds of the praline mixture onto parchment - you want to do this as quickly as possible because the candy mixture will set quickly once it starts to cool. Ask someone to help you scoop it out if needed! I just use my wooden spoon to dollop rounds on the parchment that are about 2 inches wide. The last pralines scooped out always look the worst, but still taste delicious!
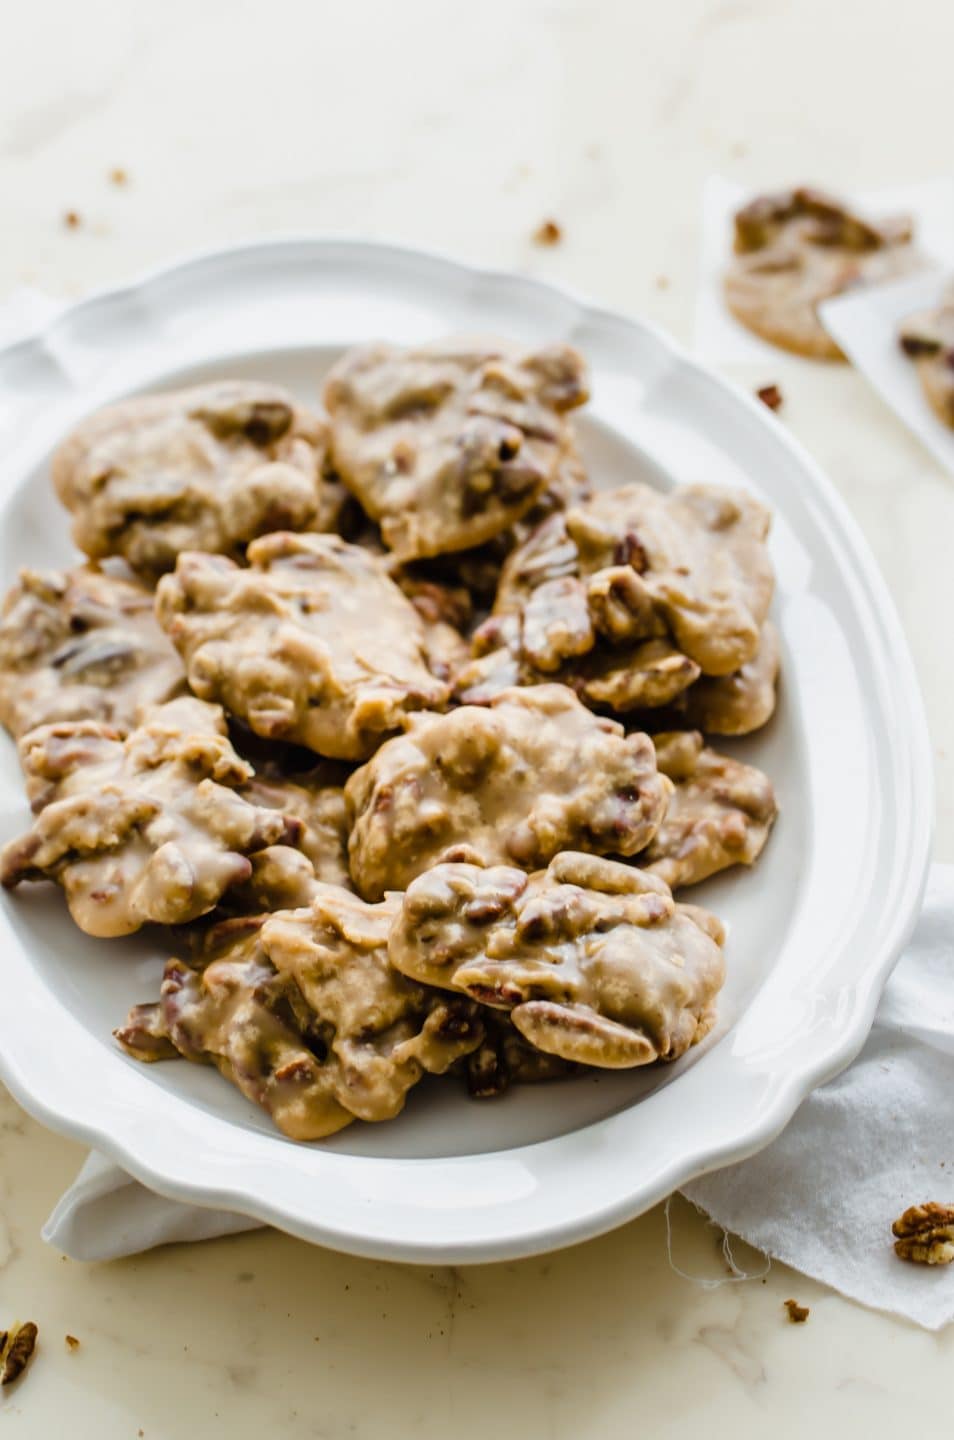
Cool slightly and enjoy! Pralines are best enjoyed while still warm, after 10-15 minutes of cooling. After a day or two of airtight storage at room temperature, they will start to get hard and crumbly. If you can enjoy them within 1-2 days, freeze them in an airtight container for up to 3 months. Sit out at room temperature for an hour before eating.
**Note: I've read that making pralines on a very dark/rainy day can prevent them from setting properly. I haven't tried this, but from other types of candy making experiences (looking at you, candy glass), I try and making candy on sunny days!**
Complete instructions are found in the recipe below.
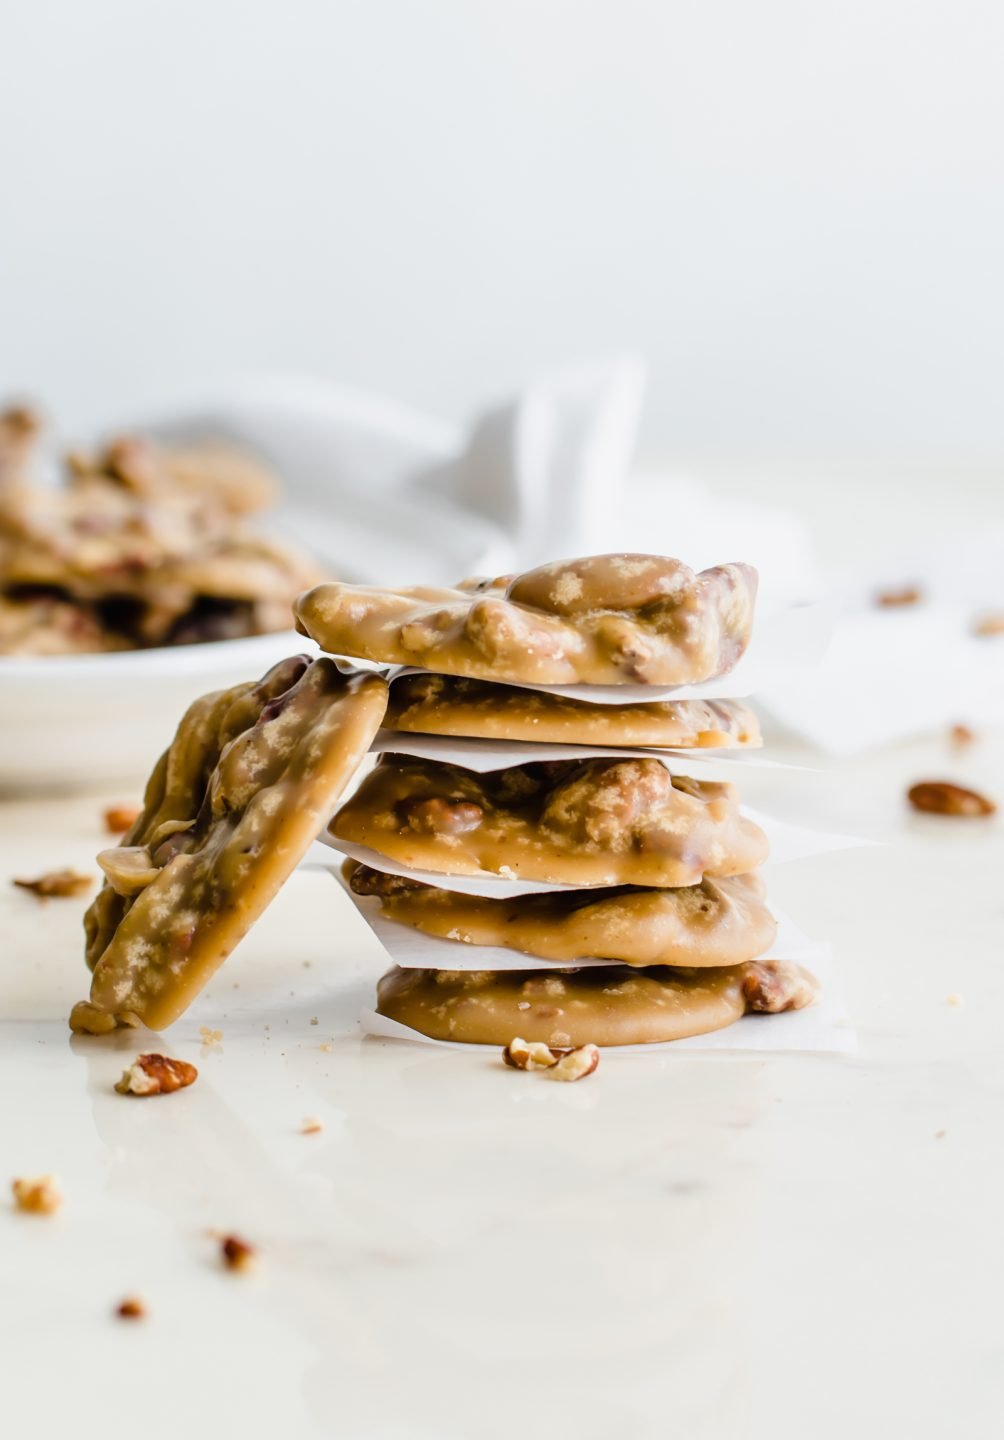
The picture below is of a freshly-scooped praline - you'll see it's still slightly shiny....

As the praline cools, it will start to become cloudy. The little white specs around the nuts are called "bloom" from the sugar. At first, I thought this was a sign of overmixing. But after making the pralines again, looking at lots of pictures online (including from Savannah's candy kitchen), talking to people who make pralines, and reducing the stirring time, I've learned that this is just a natural occurrence when making homemade pralines. Don't worry about it - the pralines taste delicious!
Similar Recipes
- Boiled Apple Cider Syrup
- Baked Apple Cider Donut Holes
- Apple Cider Sweet Potato Casserole
- Slow Cooker Apple Cider Pork
- Spiced Apple Butter
- Apple Dumplings with Sparkling Cider Sauce
- Applepom Fizz Mocktail
Are you ready to make these Boiled Cider Pecan Pralines? I’m so excited for you to try this recipe. Once you get the chance to make it, please let me know how it turns out for you! Leave a comment and rate the recipe below. This will help me with the creation of future recipes!
I’d also love to feature your creation in my weekly newsletter, so you can upload a photo to Instagram with the tag @sweetcayenne5 to be featured! Quick and easy recipe videos are available on my YouTube channel, and lots of menu inspiration on my Pinterest boards.
Recipe
Boiled Cider Pecan Pralines
Ingredients
- 1 ½ cups pecan halves
- 1 cup white granulated sugar
- 1 cup brown sugar (light or dark)
- 4 tablespoons salted butter
- ¼ cup half and half
- ¼ cup heavy whipping cream
- 2 tablespoons boiled cider (substitute with 1 ½ teaspoons of vanilla extract if needed)
Instructions
- Preheat oven to 350℉. Place pecans on a rimmed baking sheet. Toast for 5 minutes, then stir and toast an additional 4 minutes until the pecans are fragrant. Set aside.
- Line 1-2 baking sheets with parchment paper and set aside.
- In a heavy-bottom saucepan, add the sugars, butter, half and half, and cream. Place over low heat, stirring with a wooden spoon to combine as the butter and sugars melt into the cream. Once melted and combined, increase heat to medium.
- Continue to stir slowly until the mixture comes to a vigorous boil (it will simmer first and then the boil will become more rapid). It will start to boil around the 225℉ mark.
- Once it is rapidly boiling, stop stirring. Boil until the mixture reaches the soft ball candy stage on the thermometer, which should be between 236-240℉ and take 3-4 minutes from the initial boil. Remove from heat and stir in the boiled cider. Let cool for 2 minutes. Stir in the pecans and then stir vigorously until the mixture turns cloudy and thickens to a consistency of thick syrup, about 2 minutes.
- Working quickly, spoon the hot mixture into mounds on the prepared baking sheets lined with parchment. You should get 14-16 pralines out of this batch. Let the pralines cool for 15-20 minutes or until they are easily removed from the parchment. They are delicious served slightly warm!
- Pralines are best within a day or two of making them. As each day passes, they will become dry and crumbly. Store at room temperature in an airtight container, or freeze the pralines between layers of parchment up to 3 months, thawing at room temperature for 1-2 hours before serving.